Get a Gemini API Key, Step by Step
This guide walks through the three steps of setting up Gemini in Ayumi, with a screenshot for each step:
- Get a free API key in Google AI Studio
- Add the key to Ayumi
- Turn on billing so Google does not use your journal to train its models (recommended)
You need a Google account. Steps 1 and 2 take about five minutes and cost nothing. Step 3 asks for a payment method. Steps 1 and 3 work on a computer or a phone; pick the tab for the device you are using.
1. Get a free API key
Section titled “1. Get a free API key”-
Open aistudio.google.com/apikey and sign in with your Google account. The first time, Google may ask you to accept its terms.
-
Click Create API key at the top right.

If a key is already listed (Google sometimes creates one for you), you can use it. Click its name and go to step 6.
-
Under Choose an imported project, open the menu and choose Create project.
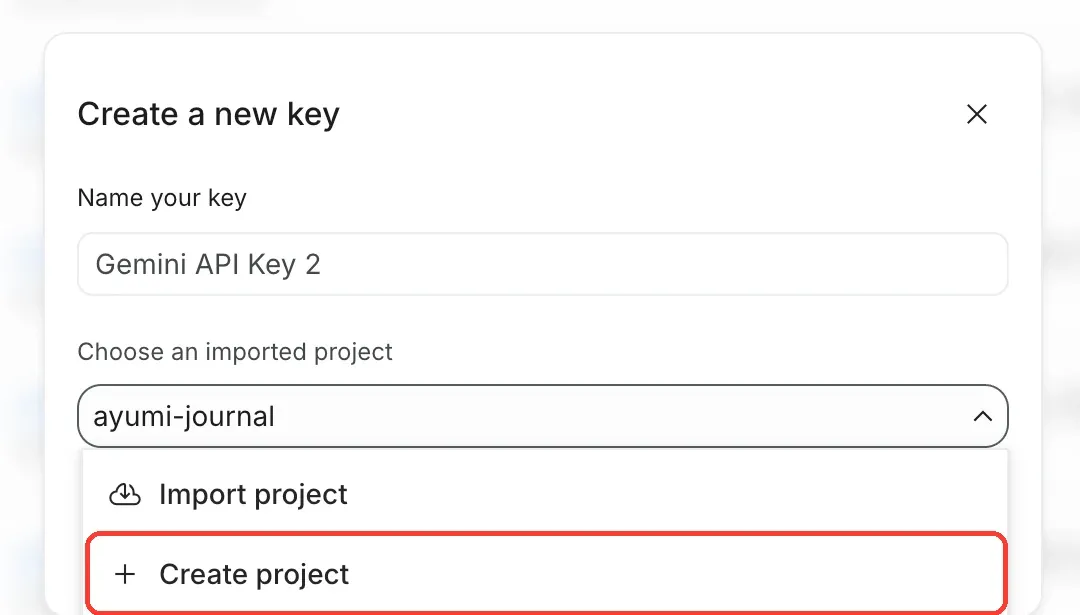
-
Name the project, for example
Ayumi, and click Create project. A separate project keeps Ayumi’s usage and billing apart from anything else you use Gemini for.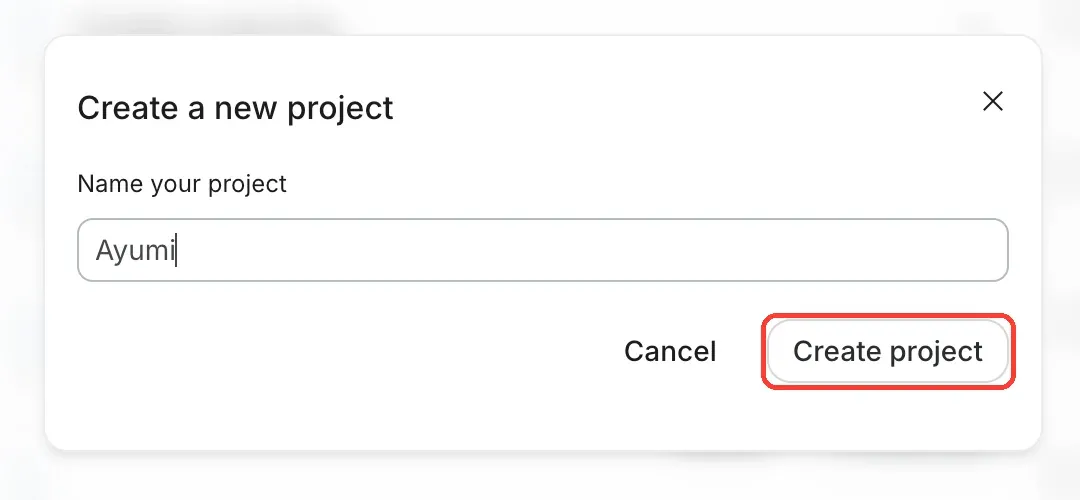
-
Back in Create a new key, name the key (for example
Ayumi), check that the new project is selected, and click Create key.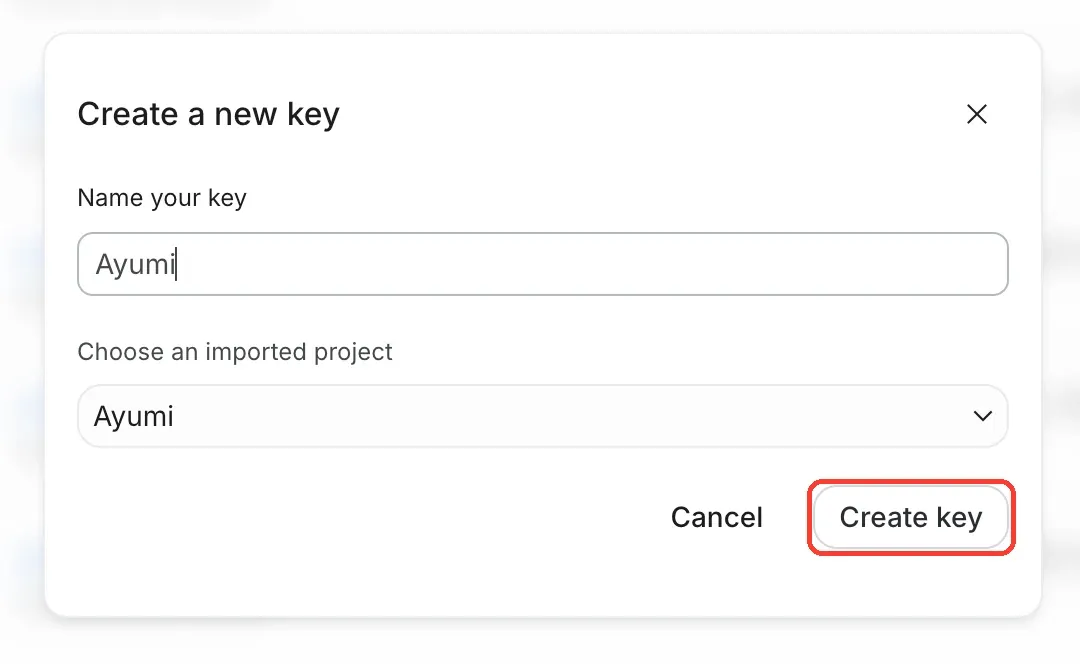
-
API key details opens. Click Copy key.
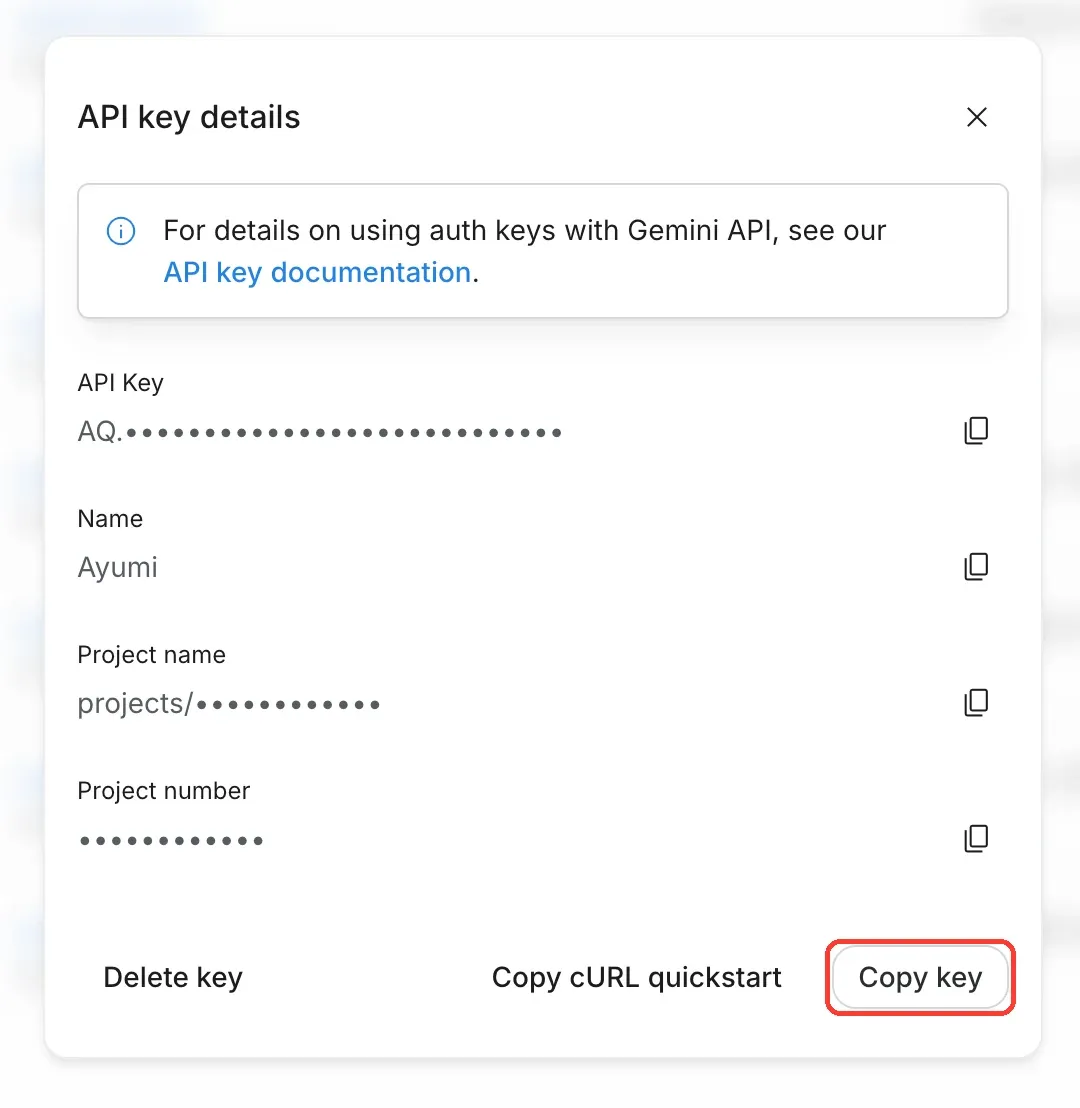
-
In Safari or Chrome, open aistudio.google.com/apikey and sign in with your Google account. The first time, Google may ask you to accept its terms.
-
Tap Create API key at the top right.
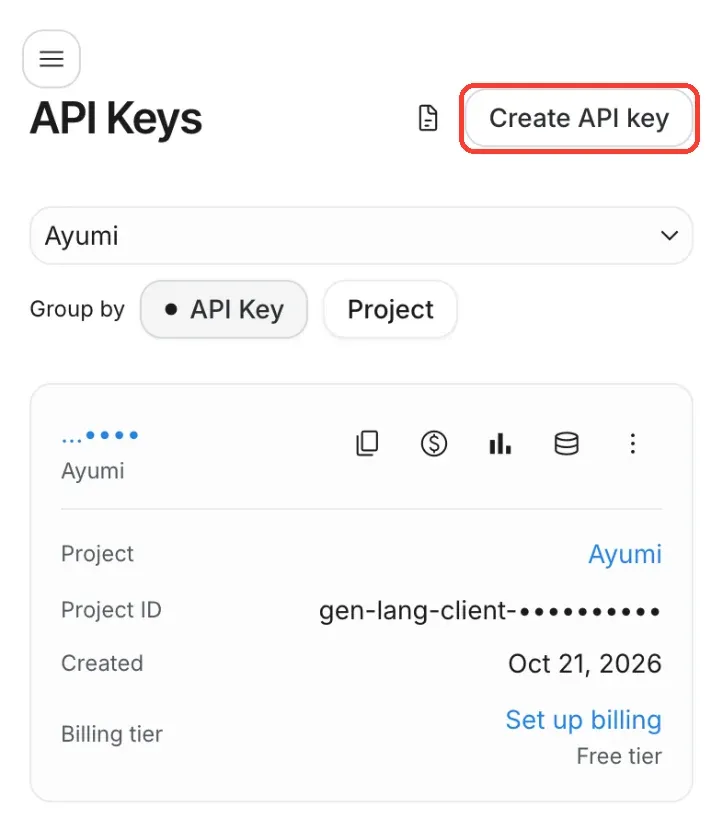
If a key is already listed (Google sometimes creates one for you), you can use it. Tap its name and go to step 6.
-
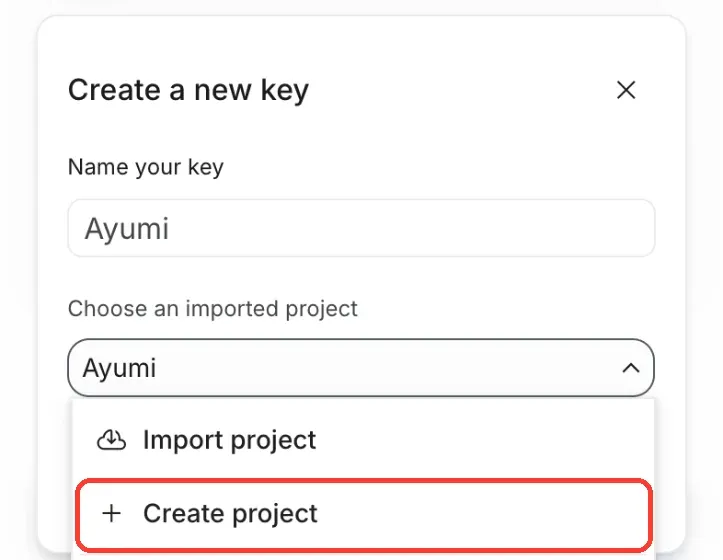
Under Choose an imported project, open the menu and choose Create project.
-
Name the project, for example
Ayumi, and tap Create project. A separate project keeps Ayumi’s usage and billing apart from anything else you use Gemini for.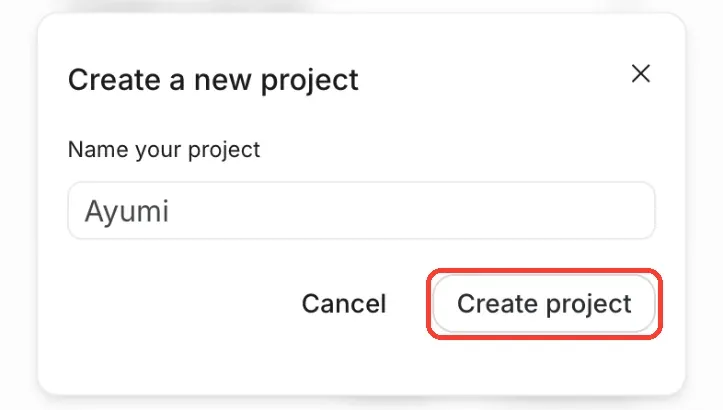
-
Back in Create a new key, name the key (for example
Ayumi), check that the new project is selected, and tap Create key.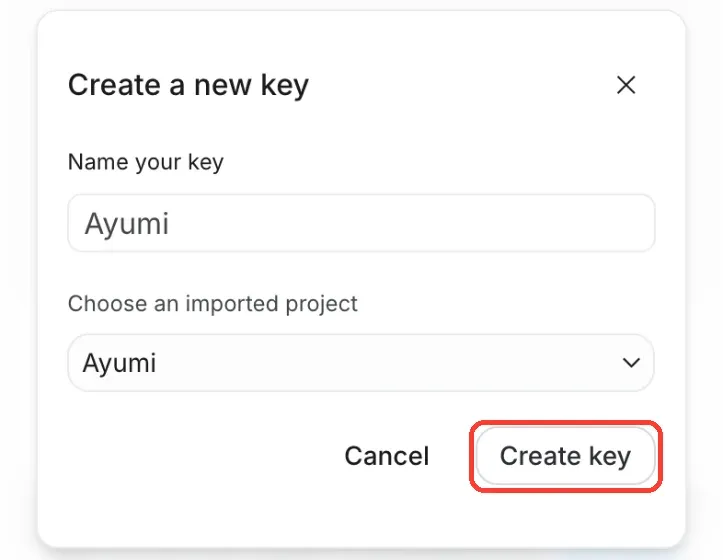
-
API key details opens. Tap the copy button to the right of API Key. On a phone there is no Copy key button at the bottom.
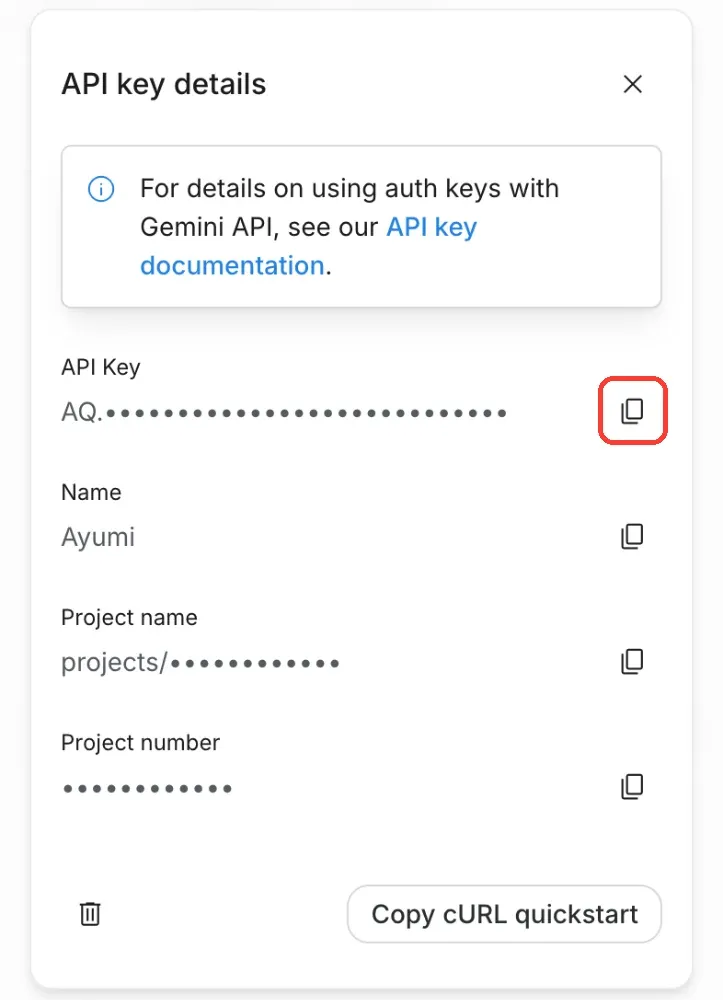
You can come back for the key at any time: on the API Keys page, click or tap the key’s name to open API key details again.
2. Add the key to Ayumi
Section titled “2. Add the key to Ayumi”Ayumi saves the key in your device’s Keychain as you type. There is no Save button.
If you copied the key on a Mac, you can paste it on an iPhone signed in to the same Apple Account (Universal Clipboard).
-
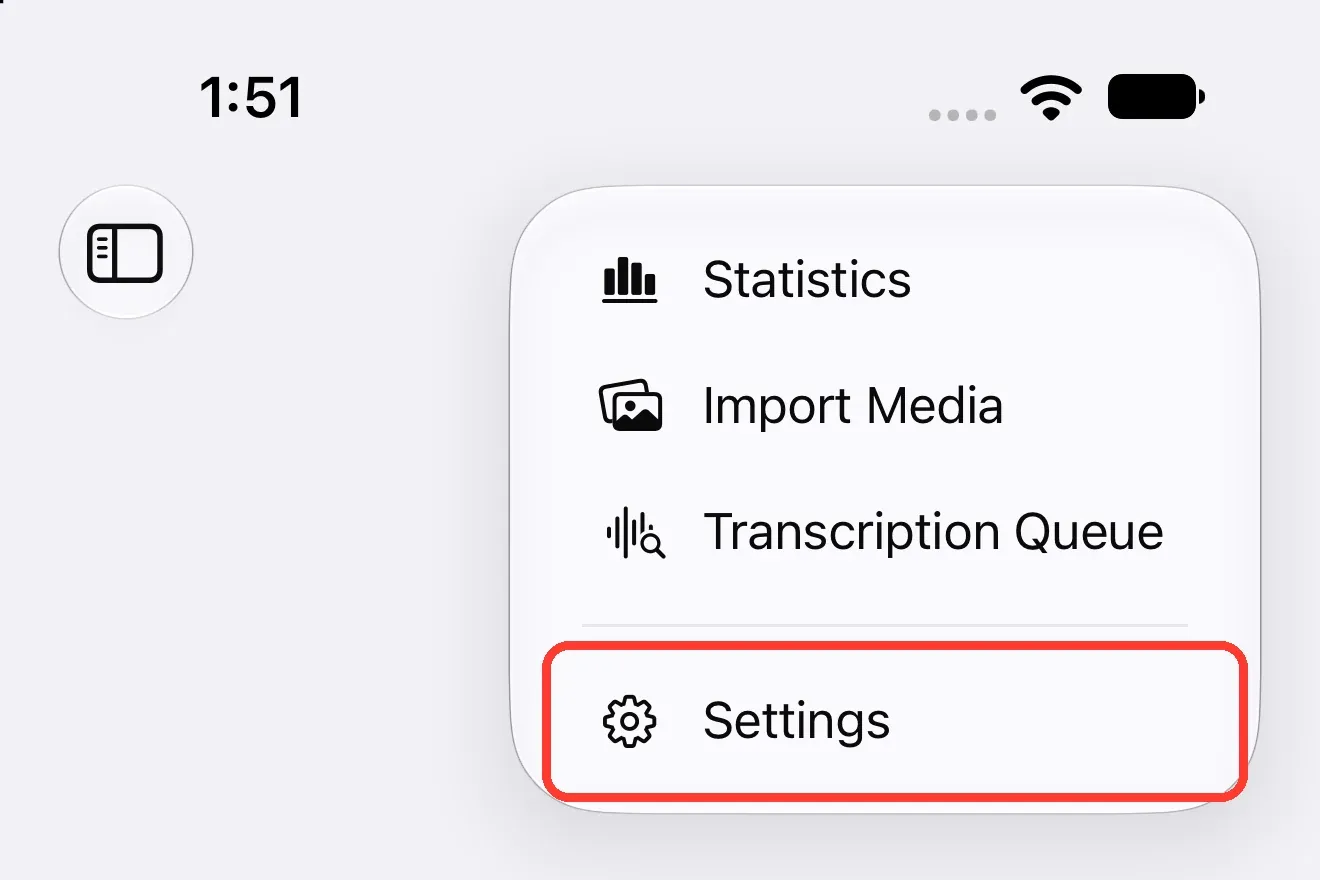
On the journal screen, tap the More button (…) at the top right, then Settings.
-
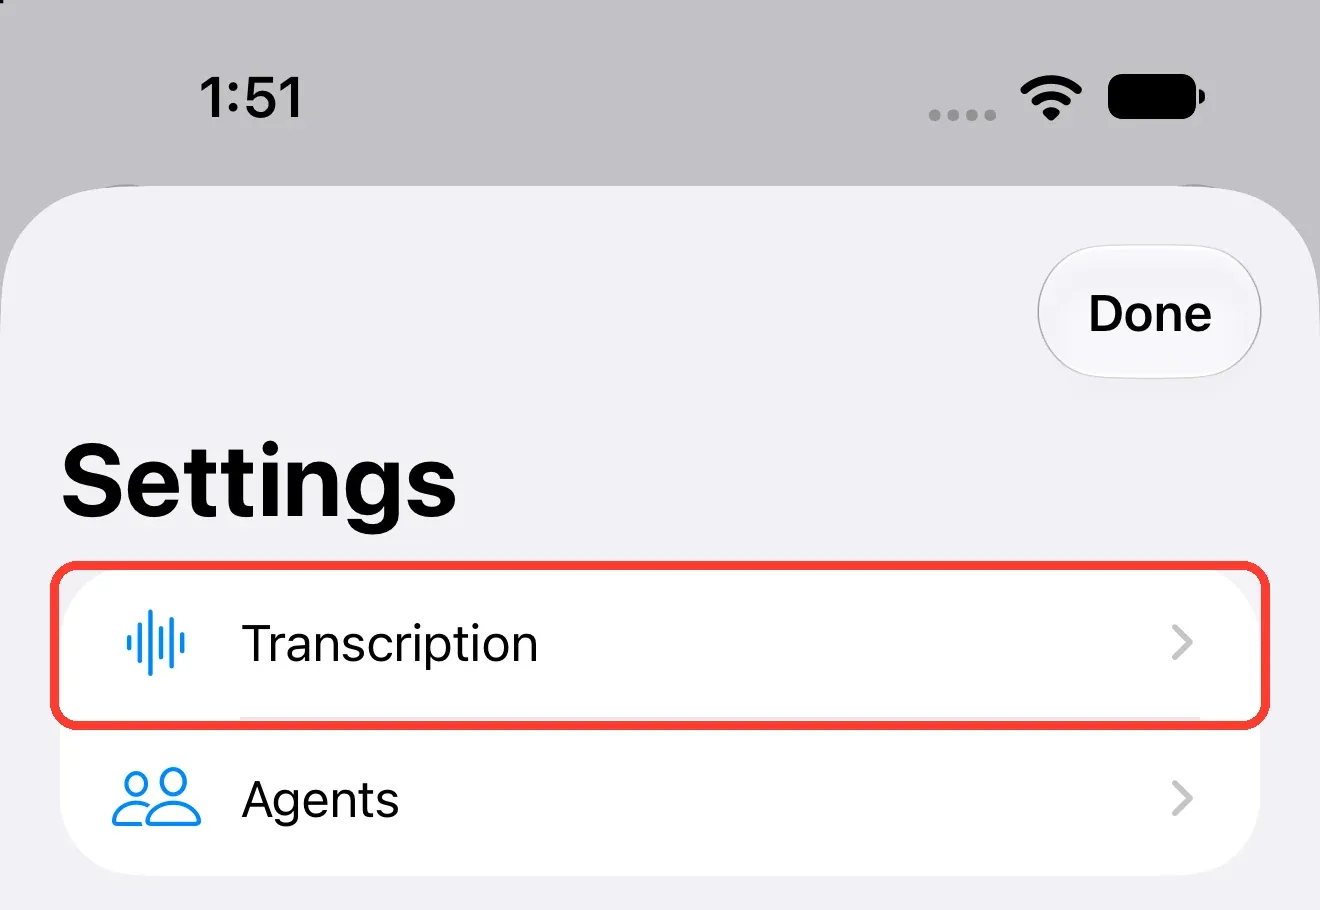
Tap Transcription.
-
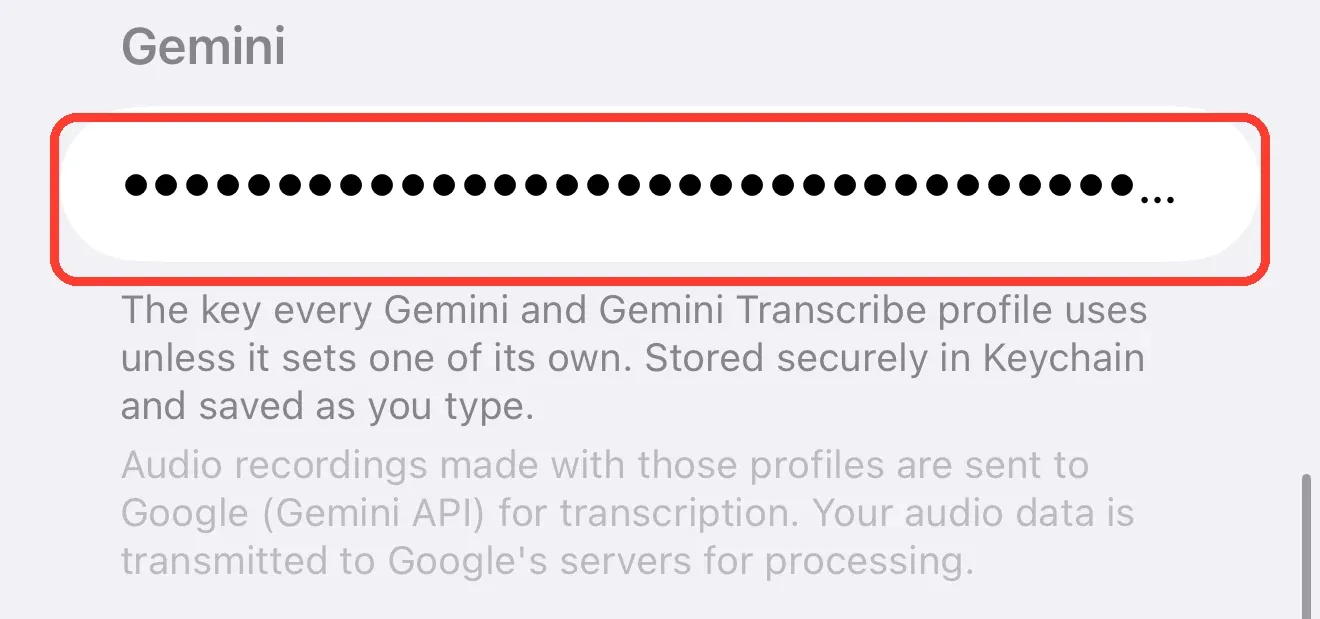
Scroll down to the Gemini section. Tap the API Key field, tap it again, and choose Paste.
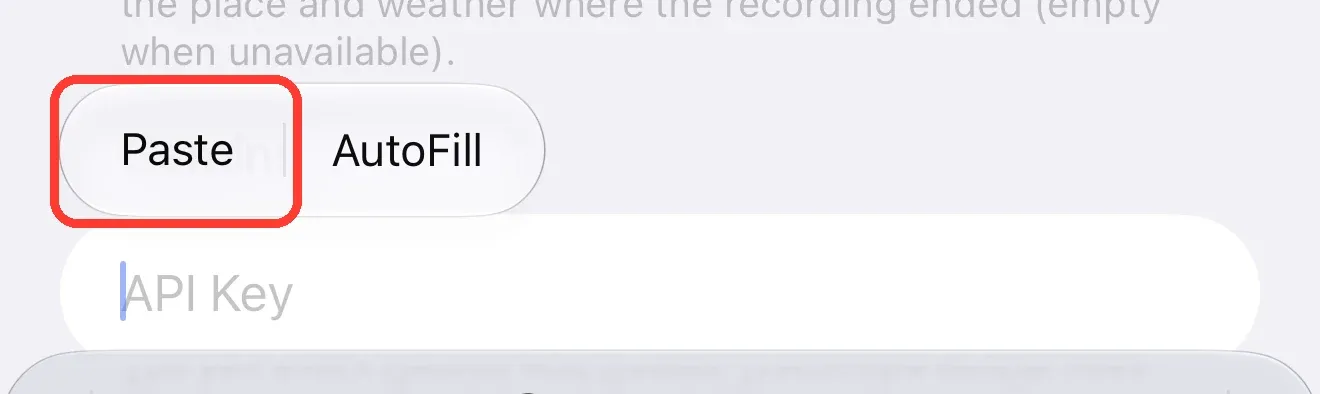
The key appears as dots.
-
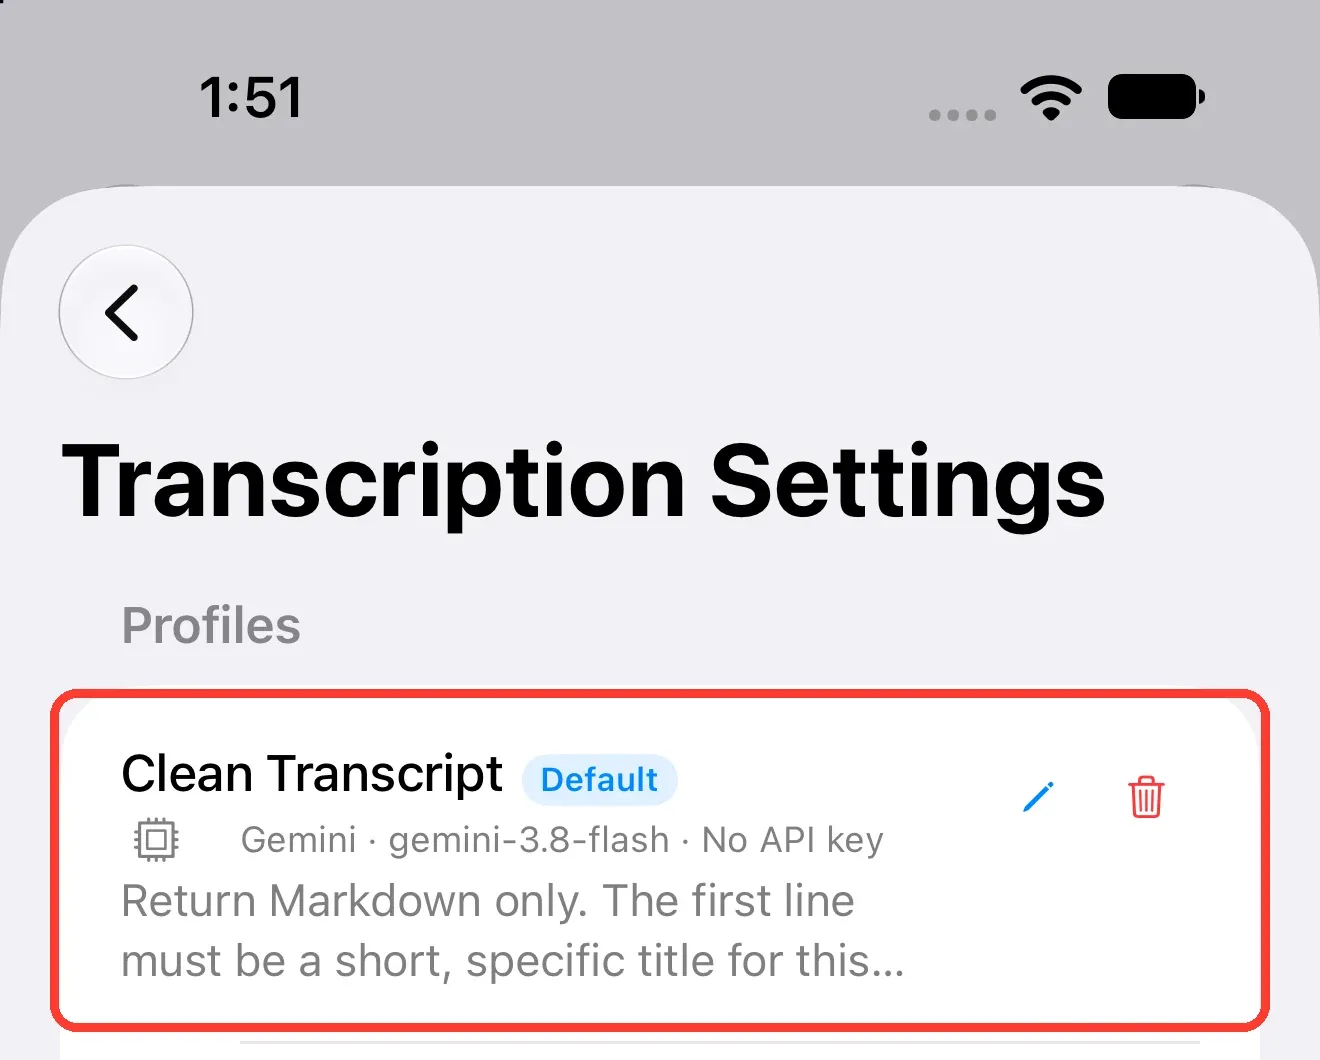
Scroll back up to Profiles and tap ☆ on a Gemini profile, such as Clean Transcript, to make it the default. The Default label moves to that profile. You can also leave the default as it is and pick a Gemini profile on the recording screen when you want it.
-
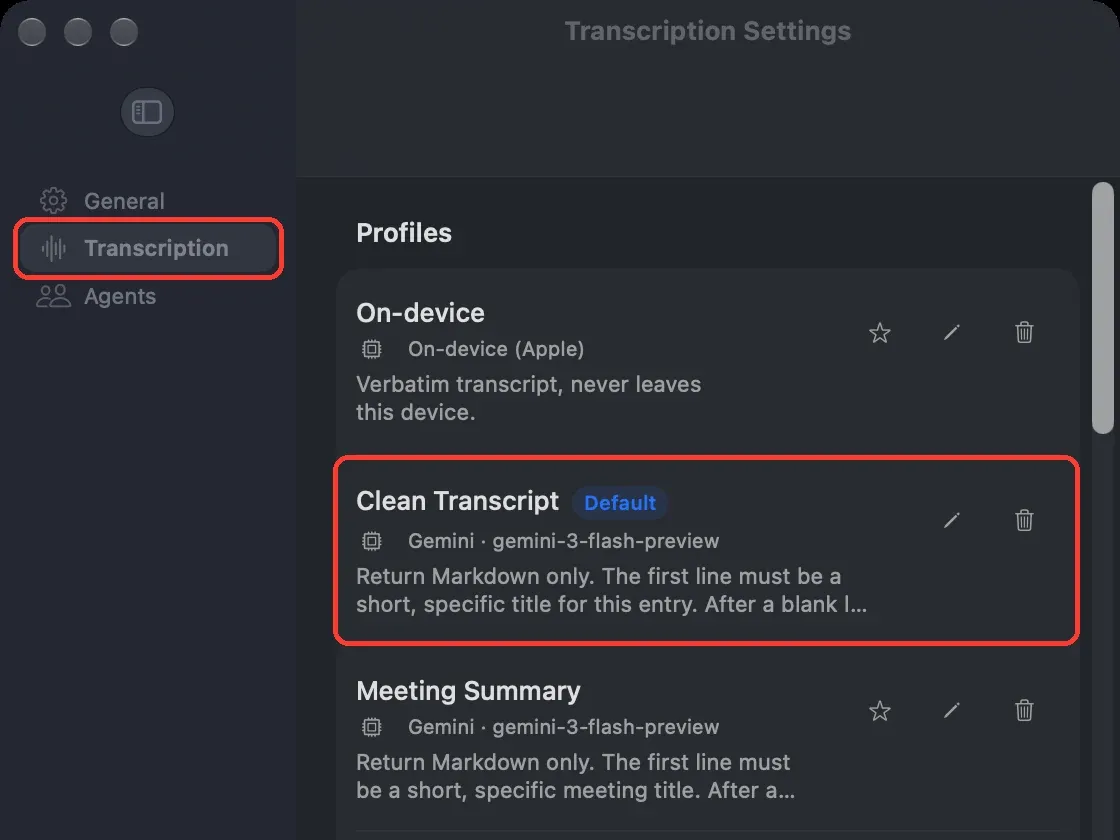
Choose Ayumi > Settings in the menu bar (or press
Cmd+,), then click Transcription in the sidebar. -
In Profiles, click ☆ on a Gemini profile, such as Clean Transcript, to make it the default. The Default label moves to that profile. You can also leave the default as it is and pick a Gemini profile when you record.
-
Scroll down to the Gemini section, click the API Key field, and paste with
Cmd+V. The key appears as dots.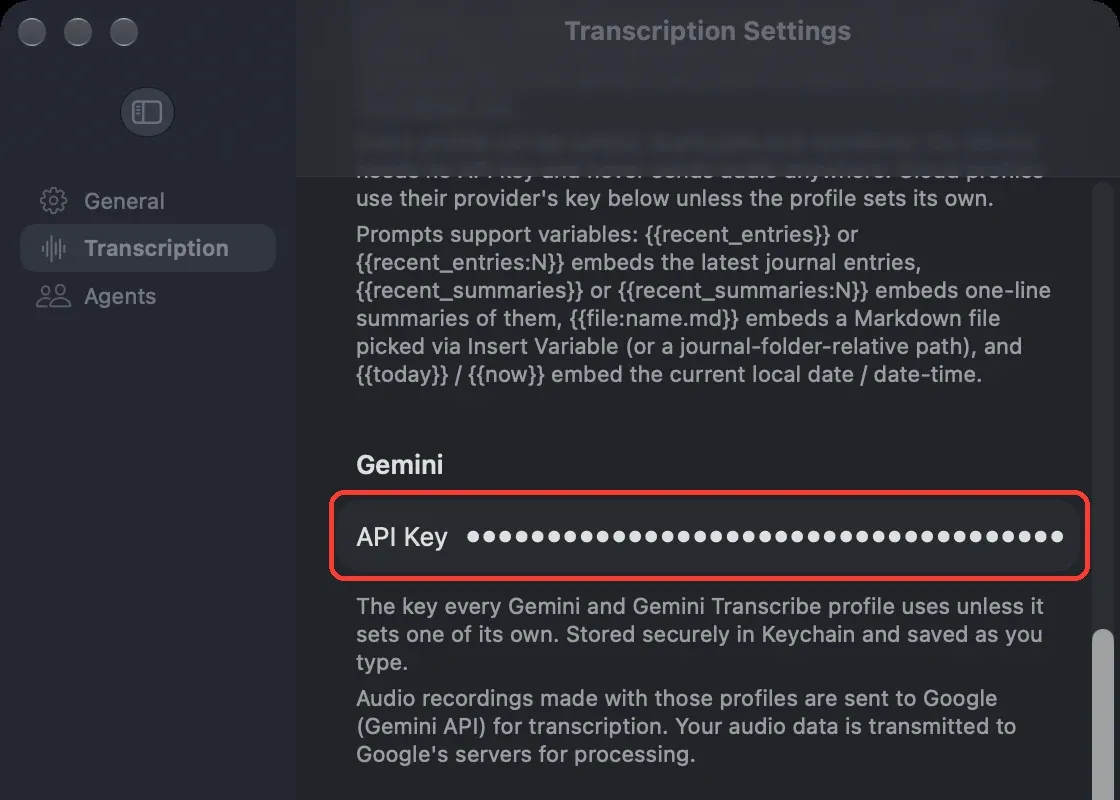
The next time you record with a Gemini profile, Ayumi asks once whether it may send audio to Google. After that, transcripts come from Gemini.
3. Turn on billing (recommended)
Section titled “3. Turn on billing (recommended)”On a free key, Google may use what Ayumi sends, your recordings and prompts, to improve its products, and human reviewers may read it. Once the key’s project has billing turned on, Google no longer uses it for that. The details and Google’s terms are in How Google handles your data.
Turning on billing does not change your key, so there is nothing to redo in Ayumi. Light personal journaling usually costs little. Check Google’s pricing for current rates.
-
Open aistudio.google.com/apikey. In the row for your Ayumi key, click Set up billing in the Billing Tier column. Free tier under it means billing is still off.

-
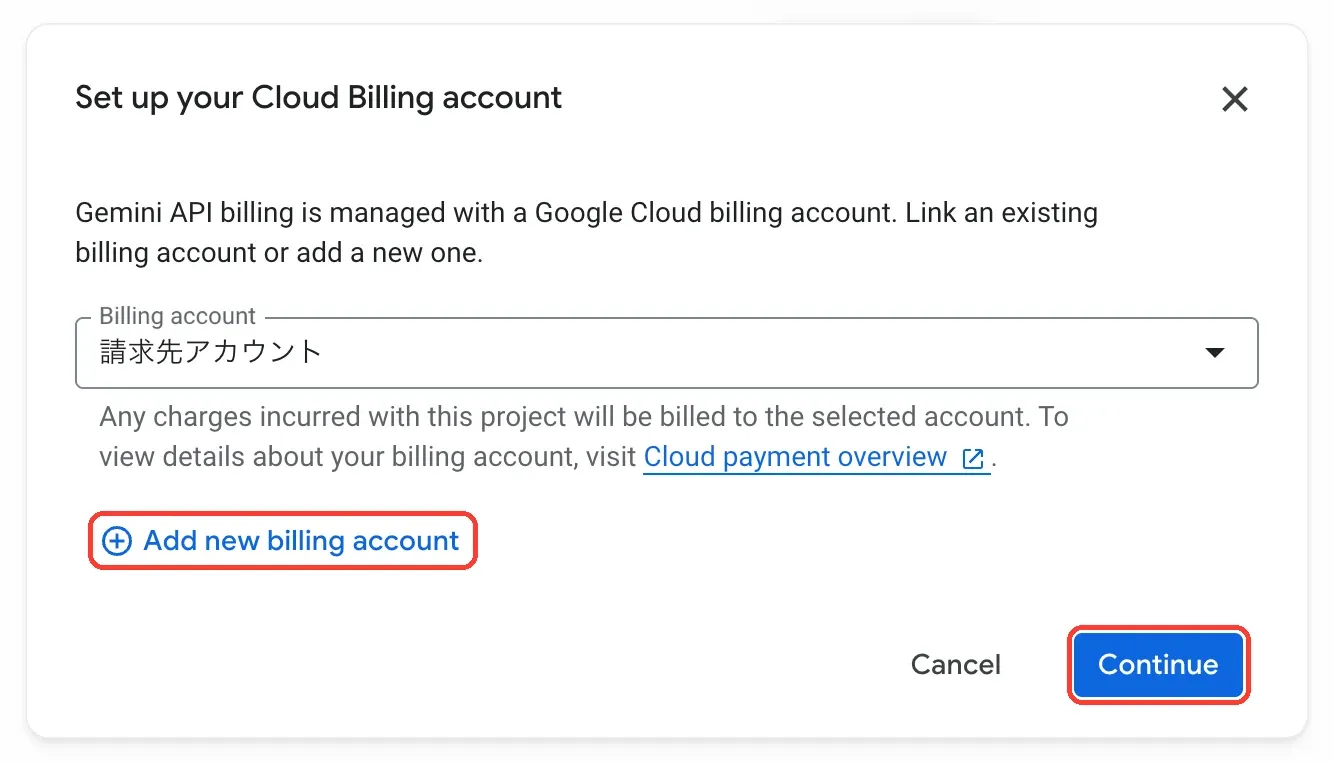
If you already have a Google Cloud billing account, choose it under Billing account and click Continue. Otherwise, click Add new billing account.
-
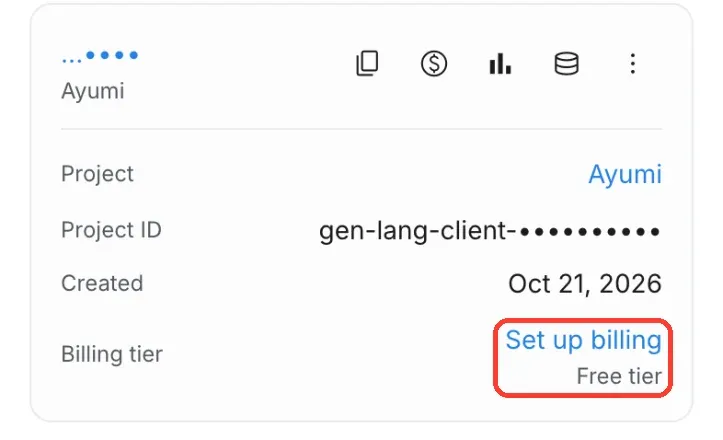
Open aistudio.google.com/apikey. On the card for your Ayumi key, tap Set up billing next to Billing tier. Free tier under it means billing is still off.
-
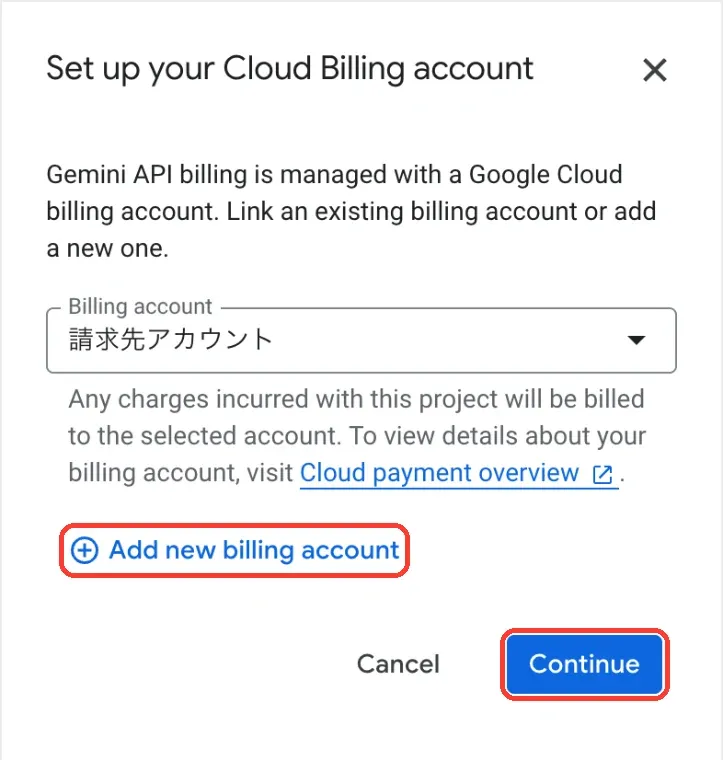
If you already have a Google Cloud billing account, choose it under Billing account and tap Continue. Otherwise, tap Add new billing account.
-
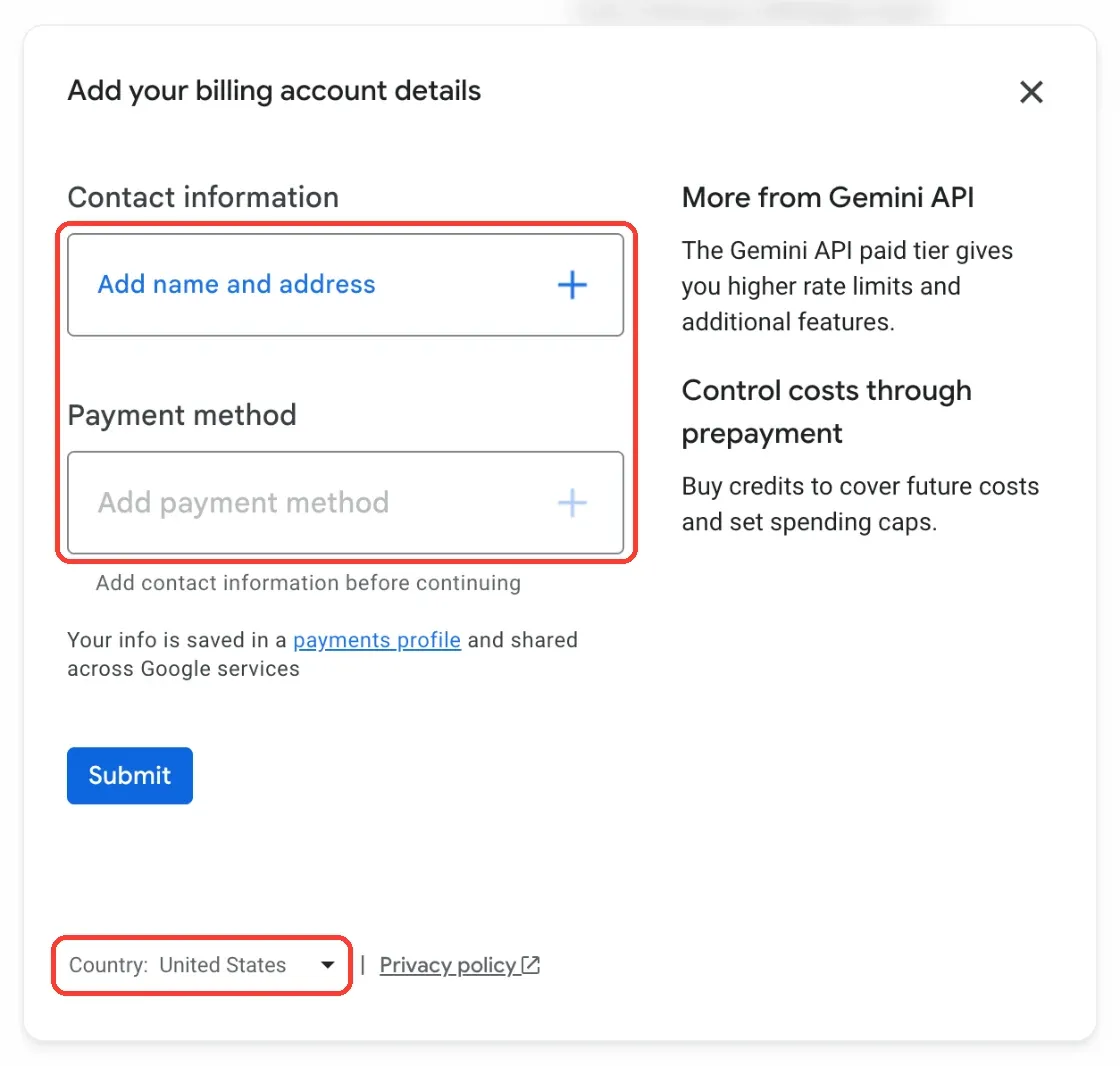
Under Contact information, add your name and address, then add a Payment method and submit. Check Country at the bottom first: it may not match where you live, and you choose it before the other fields. On a phone the same fields are stacked in one column.
-
Depending on your account, Google then asks you to prepay credit (from $5), lets you choose between prepaying and paying afterwards, or puts you on pay-afterwards. Follow the screens to the end.
-
Back on the API Keys page, your billing account and a tier (such as Tier 1) now appear where Set up billing was. The project is now paid.
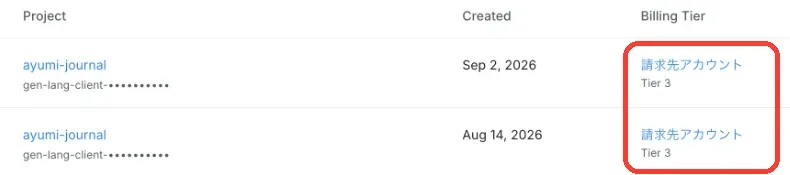
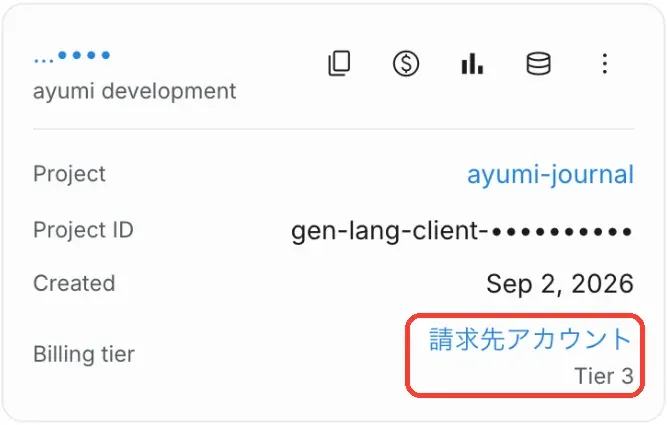
If you live in the European Economic Area, Switzerland or the United Kingdom, Google applies the paid data terms even on the free tier.
Troubleshooting
Section titled “Troubleshooting”Transcription fails with an API key error. Copy the key again from API key details (click or tap the key’s name on the API Keys page) and paste it over the old one. Make sure no space or line break came along with it.
Requests fail with a quota or rate-limit error. The free tier has low limits. Wait a minute and retry from the transcription queue, or turn on billing for higher limits.
I want to stop using Gemini. Star the On-device profile. Your key stays saved but Ayumi no longer sends audio to Google by default. To revoke the key itself, open API key details in AI Studio and delete the key (Delete key on a computer, the trash button on a phone).
From the same maker: Kitae, a dead-simple strength-training log
Follow Ayumi: X (@AyumiJournalApp)